You've picked your finish, scheduled the install, and you're looking at a garage full of accumulated stuff. Getting ready for an epoxy floor installation isn't complicated, but doing it right makes the process go smoother, protects your belongings, and helps the installer do their best work.
Why preparation matters from the installer's perspective
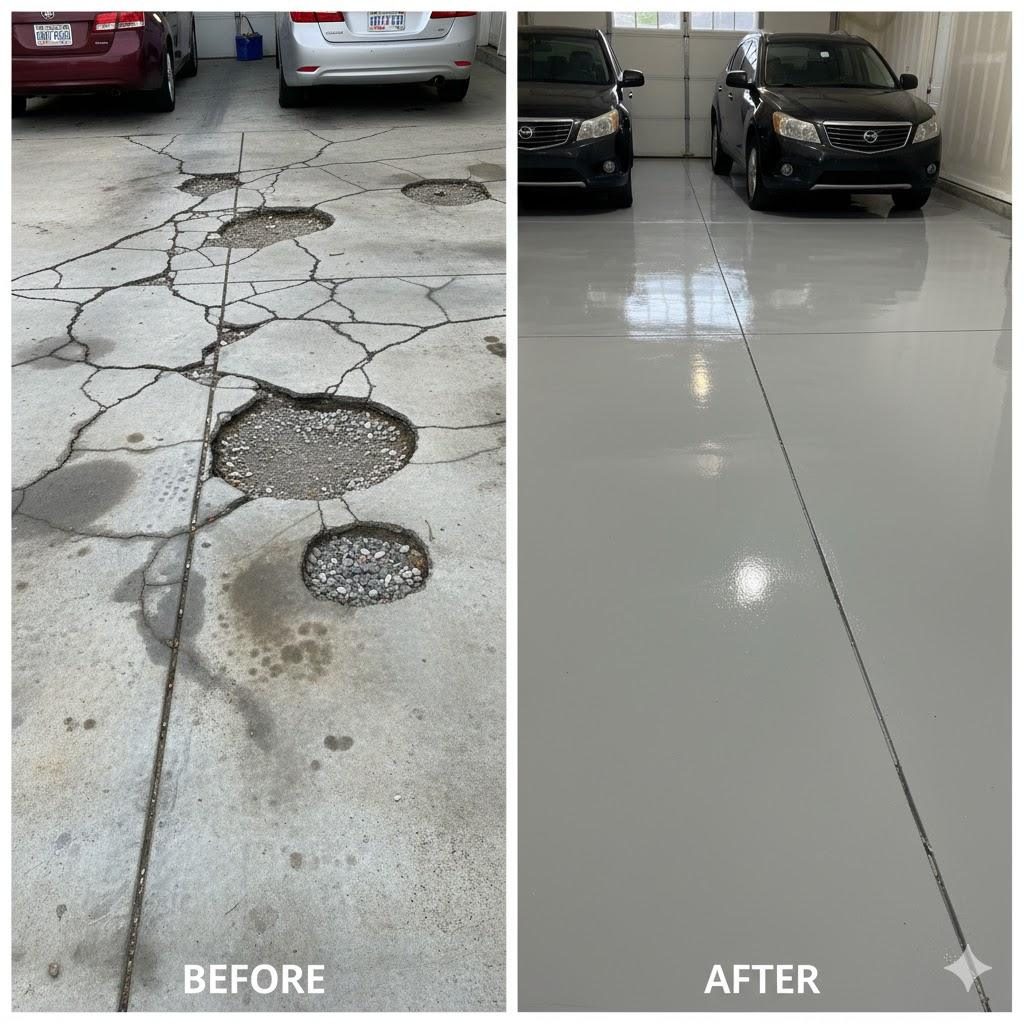
A professional epoxy installation involves heavy grinding equipment, industrial vacuums, and liquid coatings. Dust from diamond grinding is fine and travels throughout the space even with dust collection systems. Epoxy overspray happens near the application zone. Anything in the garage that you'd rather not have covered in concrete dust or reached by overspray needs to be out before work begins.
Beyond protecting your belongings, a clear space lets the installer work efficiently and reach every corner of the slab. Floors that can't be fully accessed — because a storage shelf is in the way or the freezer is too heavy to move — end up with uncoated edges that collect dirt and create visible seams.
Step 1: Clear the garage completely
Everything needs to come out. Not just the cars — everything. Tools, workbenches, storage shelves, bicycles, holiday decorations, sports equipment, the stuff you've been meaning to deal with for years. If it's on the floor or could be affected by dust and overspray, it needs to go.
This is a good opportunity to declutter. Items you haven't used in years probably don't need to come back. Items you're keeping should be stored elsewhere — another part of the house, the yard under a tarp, or temporarily in a storage unit.
A few specific items worth noting:
- Wall-mounted storage and shelving — if mounted to the walls rather than sitting on the floor, this can usually stay as long as the installer can reach beneath it. Confirm with your installer beforehand.
- Heavy appliances — chest freezers, second refrigerators, and similar items are heavy enough that some installers can work around them if given advance notice. Ask rather than assuming.
- Water heaters and mechanical equipment — these typically stay in place, and the installer will coat up to and around them.
- Drain covers and floor hardware — the installer will tape or temporarily remove these. Point them out when they arrive.
Step 2: Basic floor cleaning
The installer's prep process — diamond grinding, degreasing — is far more effective than anything you can do yourself. But a basic sweep and removal of obvious debris helps the process go more efficiently.
What's worth doing: sweep or blow out loose dirt, leaves, and debris; pick up any fasteners, glass, or sharp objects that could damage grinding equipment; remove any area rugs or mats from the floor.
What not to worry about: oil stains (the installer will degrease these), old paint or previous coatings (grinding removes these), and minor dirt and grime. You don't need to scrub or mop the floor yourself — this can sometimes introduce moisture or cleaning product residue that interferes with prep.
Step 3: Flag known issues for your installer
Before the install begins, walk the floor with your installer and point out anything you're aware of. A good installer will find these things during prep, but calling them out in advance allows an informed conversation about how they'll be handled and whether there's any effect on cost or timeline.
Worth flagging: cracks (especially ones you've watched widen over time), areas that stay wet or damp, previous coating attempts, heavy oil contamination history, and any low spots where water pools.
Step 4: Address moisture proactively
If you've noticed condensation on the floor, damp spots, or a floor that always feels slightly wet, mention this before the install. Moisture testing before grinding is the responsible approach, and knowing about concerns in advance lets your installer plan for the right primer system.
Step 5: Plan for the cure window
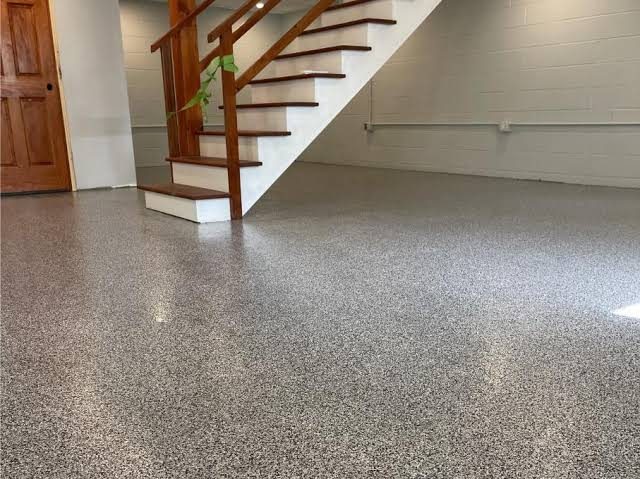
Your garage will be out of commission during installation and through the cure period. For a typical residential flake system with a polyaspartic topcoat:
- Day of install — inaccessible from work start through the evening
- 12–24 hours after completion — light foot traffic is usually fine
- 24–48 hours — vehicles can typically be driven back in
- Full cure — 5–7 days; avoid harsh chemicals and heavy dragging during this window
Plan to park vehicles elsewhere for at least 24 hours, ideally 48. If you have motorcycles, ATVs, or heavy equipment that needs in sooner, let your installer know in advance so they can factor cure time into the schedule or product selection.
Step 6: Protect adjacent areas
Grinding concrete produces very fine dust that travels even with professional dust collection. If your garage connects directly to the house, close the interior door and place a draft blocker at the threshold. Sensitive electronics or finished surfaces in adjacent rooms may benefit from a light covering on installation day.
Professional installers typically tape the base of walls and around drains before coating begins. If you have recently painted walls or finished baseboards you're concerned about, mention this.
Step 7: Plan around weather
Temperature and humidity on installation day affect epoxy performance. Your installer monitors these conditions, but a few things are worth knowing: if it's a cold day, an unheated garage may need to be warmed before application. If your garage has a heater, having it running in advance is helpful. Let your installer know if the space runs particularly cold.
The day-before checklist
The night before your installation: garage completely cleared, floor swept, known issues noted, vehicles parked elsewhere, the path from the street to the garage clear for equipment, start time confirmed. That's everything. The installer handles the rest.
What happens on installation day
A typical residential flake installation follows this sequence:
- Setup and masking — taping walls, drains, and transitions; setting up dust collection
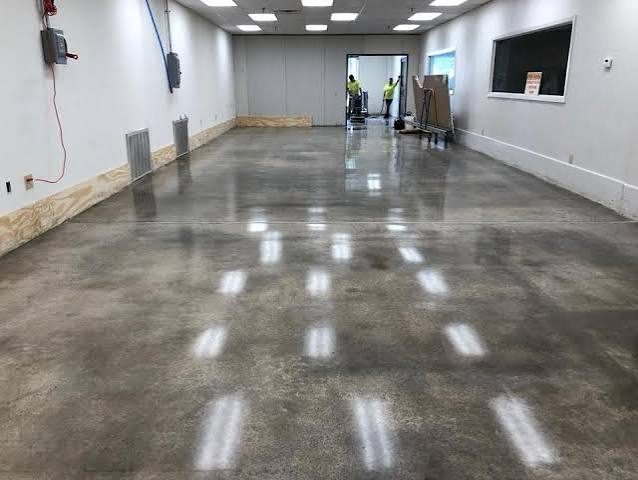
- Diamond grinding — the noisiest and dustiest phase, typically 1–3 hours
- Crack and defect repair — filling cracks, patching spalls
- Base coat application — pigmented epoxy base applied and allowed to tack
- Flake broadcast — flake is broadcast into the wet base coat
- Cure and prep — base coat cures, excess flake is scraped, surface is lightly sanded
- Topcoat — polyaspartic clear coat is applied
- Final walk-through — the installer reviews the finished floor with you, explains care instructions, and confirms the return-to-service timeline
The whole process for a two-car garage typically takes 6–10 hours. Ask your installer for the expected schedule when you book so you can plan your day accordingly.