A peeling epoxy floor is one of the most frustrating home improvement outcomes — you paid for something that was supposed to look great for years, and instead you're watching it lift off in sheets within months. The good news, if there is any, is that epoxy failures are almost always predictable and preventable. They happen for specific reasons, and understanding those reasons is the clearest path to making sure it doesn't happen to you.
The fundamental principle: bond or fail
Epoxy is an adhesive coating. Its entire performance depends on its ability to bond chemically and mechanically to the concrete beneath it. When that bond is compromised — for any reason — the coating will eventually lift. It might take weeks, months, or a couple of years depending on the severity of the bond failure and the traffic on the floor, but the outcome is the same.
Everything in this guide comes back to that one principle. The question "why did my floor peel?" almost always has an answer somewhere in the bond — what compromised it, how, and when.
The most common cause: inadequate surface preparation
If you only read one section of this guide, make it this one. Surface preparation is responsible for the vast majority of epoxy failures, and it's the area where the most corners get cut.
Why concrete needs to be opened up
Fresh concrete cures with a relatively tight, smooth surface — tighter than it looks. That smooth surface doesn't give epoxy much to grip. For a coating to bond properly, the surface needs a specific texture, called a Concrete Surface Profile (CSP), that gives the epoxy something to key into mechanically. The right CSP for most epoxy systems is a fine-to-medium texture, similar to rough sandpaper.
There are two ways to achieve this profile. One works. One doesn't.
Diamond grinding: the right method
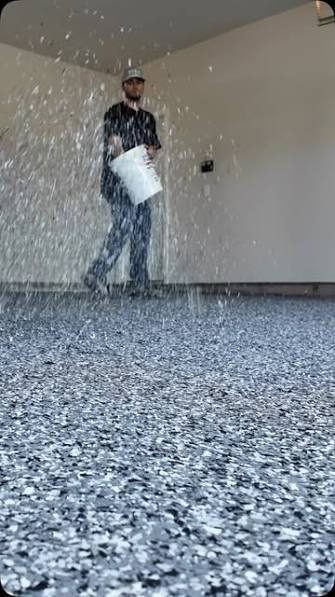
Mechanical diamond grinding uses a machine fitted with diamond-tipped tooling to abrade the top layer of the concrete. It's slow, noisy, and generates a lot of dust (handled with industrial vacuums in professional installs). It consistently produces the right surface profile across the entire slab, removes existing sealers or contamination, and exposes fresh concrete for the coating to bond to.
A properly ground slab looks uniform — slightly matte and consistent in texture from edge to edge. You can feel the texture with your hand. That's the surface that makes a coating last.
Acid etching: the shortcut that fails
Acid etching involves pouring a dilute acid — typically muriatic acid — onto the concrete, letting it react, rinsing it off, and letting the slab dry. It's fast, requires no heavy equipment, and costs almost nothing. It's also why so many garage floors peel.
The problems with acid etching are numerous. It produces an inconsistent profile — deeper where the acid pooled, shallower where it didn't. It doesn't remove previous sealers, oils, or curing compounds that might be present on the slab. Any residue left from the acid or the rinsing process interferes with epoxy adhesion. And it does nothing for high or low spots in the slab.
DIY kits from hardware stores almost universally specify acid etching because it requires no equipment. Budget contractors use it for the same reason. And the floors they produce fail at a significantly higher rate than mechanically prepared surfaces. If a contractor tells you they etch rather than grind, that's enough information to move on.
Moisture: the invisible destroyer
Concrete is porous. Slabs — particularly basement slabs and garage slabs without an adequate vapor barrier beneath them — allow moisture to migrate up from the soil through the concrete. This vapor pressure pushes upward against the underside of any coating applied to the surface.
When the vapor pressure exceeds the bond strength of the coating, the coating lifts. It typically shows up as bubbles or blisters first, followed by delamination in sheets. It's particularly common in Utah and Idaho in spring and early summer when soil moisture is highest.
Proper moisture testing before coating is non-negotiable. The ASTM F1869 calcium chloride test or the ASTM F2170 relative humidity probe test both give quantitative readings of vapor emission rates. If the readings exceed the product's stated limit, a moisture-mitigation primer needs to be installed before the coating system — not skipped, not hoped away.
Many failed floors could have been prevented with a $50 moisture test and a slightly different product selection. It's one of the clearest examples in the trades where skipping a simple diagnostic step creates an expensive problem downstream.
Contamination: oil, grease, and curing compounds
Oil and grease that have soaked into a garage slab are among the most common failure points on residential installs. Even if the slab looks clean, years of vehicle parking leave hydrocarbon contamination well below the visible surface. Grinding over it isn't always enough — the grinding can drive oil deeper and spread it laterally.
Effective degreasing requires a penetrating degreaser, applied and agitated into the slab, allowed to dwell, and then removed. In severe cases, multiple applications are needed. Shot blasting — which propels steel shot at the surface to mechanically remove contamination — is sometimes used for heavily contaminated slabs.
Concrete curing compounds are another source of hidden contamination. These are applied to fresh concrete during construction to slow moisture loss during curing. They're designed to seal the surface — exactly the opposite of what you want when you're trying to bond a coating. They're often invisible and easily missed. A good contractor tests for their presence and removes them as part of prep.
Cracks and slab movement
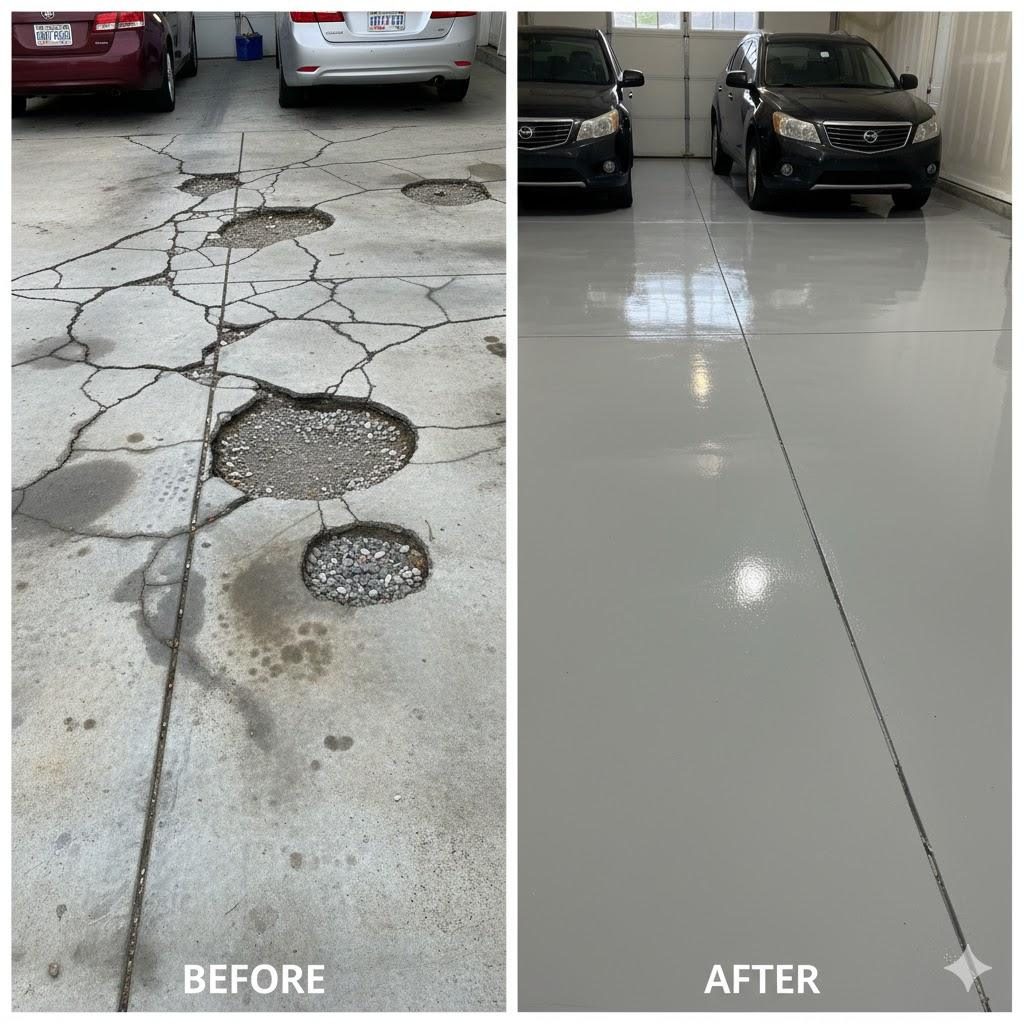
Applying epoxy over an existing crack without treating it first does one thing: it telegraphs the crack through to the finished surface, and then when the concrete moves seasonally, the crack reopens and lifts the coating on either side.
Cracks need to be routed — cut wider with a crack-chasing saw — cleaned out, and filled with a semi-rigid polyurea or polyurethane filler before coating. "Semi-rigid" is important: a rigid filler in a control joint or crack that's still moving will just crack again. The right material moves with the concrete while still maintaining a smooth surface for the coating.
Active cracks — ones that are still widening or moving — need to be assessed more carefully. In some cases, additional prep or a different approach is warranted before coating.
Product quality and application conditions
Even over a perfectly prepared surface, poor product quality or bad application conditions can cause failure:
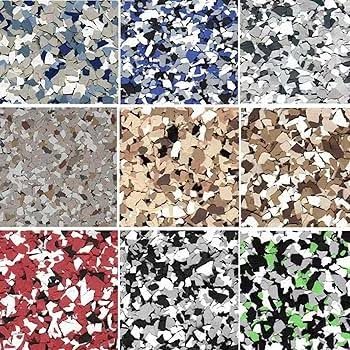
Thin, low-solids products simply don't have the film build and durability of professional-grade systems. Many consumer products are 30–40% solids; professional systems are often 85–100% solids. The difference in thickness and durability is enormous.
Temperature matters. Most epoxies have a minimum application temperature — often around 50°F — below which they won't cure correctly. Applying epoxy in a cold garage in winter without temperature control produces a soft, under-cured coating that will fail quickly.
Humidity matters. High ambient humidity during application can cause surface defects and adhesion problems, particularly with moisture-sensitive products.
Insufficient cure time between coats traps solvents and prevents proper inter-coat adhesion.
A professional installer monitors and controls these conditions. A DIYer or budget contractor may not.
How to vet a contractor before you hire
Ask these questions and listen carefully to the answers: How do you prepare the floor? (You want to hear "diamond grinding.") Do you test for moisture? How do you handle cracks? What products do you use, and can you share the technical data sheets? Do you offer a written warranty? A contractor who answers these questions specifically and confidently is someone who builds floors that last. Vague answers about "thorough prep" and "quality products" without specifics are a reason to keep looking.
When a floor has already peeled: what are the options?
If you're dealing with a failed epoxy floor, the path forward depends on how badly it failed and what caused it. A floor that's peeling due to moisture needs the moisture issue addressed before recoating — otherwise the new coating will fail for the same reason. A floor that peeled due to inadequate prep needs to be fully stripped and correctly prepared before anything new goes down.
In most cases, the failed coating needs to be mechanically removed — ground off — before the slab can be properly assessed and prepared. This adds cost to the redo, which is one more reason why doing it right the first time is almost always cheaper in the long run.
If you have a floor that's failing and want an honest assessment of why and what it would take to fix it properly, that's something we can help with. We'd rather tell you what it actually needs than sell you a coating over a problem that's going to fail again.